iOS 10 OpenVPN with Active Directory Authentication

With iOS 10, PPTP is out and IPSEC and L2TP are the main options now. PPTP uses a protocol that is neither TCP or UDP – it is GRE. And IPSEC uses yet another protocol called ESP. The problem with most VPNs is that they do not work when you need them to because many hotel and guest networks allow access to only specific protocols, such as TCP/UDP. This tutorial will show you how you can configure a simple OpenVPN server to authenticate your Active Directory users even through environments that are prone to blocking PPTP, IPSEC, and L2TP.

First, let’s download a copy of the very cool open source router, VyOS.
http://packages.vyos.net/iso/release/1.1.7/vyos-1.1.7-amd64.iso

Now, we create a VM with a 2GB partition and we install VyOS. At the prompt, login with vyos/vyos and type:

install image

When asked, set your password of choice for the vyos username. Eject the CD, reboot, and you should get to the login prompt. Login, and let’s get started.

Type the following:

configure
set system package repository squeeze components 'main contrib non-free'
set system package repository squeeze distribution 'squeeze'
set system package repository squeeze url 'http://archive.debian.org/debian'
set system package repository squeeze-lts components 'main contrib non-free'
set system package repository squeeze-lts distribution 'squeeze-lts'
set system package repository squeeze-lts url 'http://archive.debian.org/debian'
sudo apt-get -o Acquire::Check-Valid-Until=false update
sudo apt-get install krb5-config krb5-user libpam-krb5
commit

Now you should have all of the packages that you need, so its time to start configuring kerberos. Type the following:

sudo nano /etc/krb5.conf

Here is a template for a simple krb5.conf file that you will need to modify to match your domain. The IP of your domain controller will be the IP for the kdc. Take note of the case changes for the domain name. Match the example for the case for your domain.

[libdefaults]
        default_realm = MYDOMAIN.LOCAL

[realms]
        MYDOMAIN.LOCAL = {
        kdc = 10.0.0.2
        }

[domain_realms]
        .mydomain.local = MYDOMAIN.LOCAL
        mydomain.local = MYDOMAIN.LOCAL

[appdefaults]
        forwardable = true
        pam = {
            minimum_uid = 1000
            MYDOMAIN.LOCAL = {
                ignore_k5login = true
            }
        }

Now that /etc/krb5.conf is configured, we should be able to do the first test. Let’s run kinit and see if we can login. Here is an example:

kinit myuser

After you type in the password, you should be able to check if you are logged in with the klist command.

klist

If all worked, type the following.

save
exit
reboot now

Now it’s time to configure OpenVPN.
First, let’s copy over the template easy-rsa folder to the config folder so that it persists upon upgrades.

cp -r /usr/share/doc/openvpn/examples/easy-rsa/2.0 /config/easy-rsa2
cd /config/easy-rsa2
source ./vars
./clean-all 
./build-ca
./build-dh
./build-key-server 
./build-key-server  server
cp keys/ca.crt /config/auth/
cp keys/dh1024.pem ../auth/
cp keys/server.key ../auth/
cp keys/server.crt ../auth/
./build-key company

Phew! Ok, now we’re done with the prerequisites to configure OpenVPN. Let’s start configuring VyOS so that it uses all of these new settings.

configure
set interfaces openvpn vtun0 mode server
set interfaces openvpn vtun0 openvpn-option --username-as-common-name
set interfaces openvpn vtun0  openvpn-option "plugin /usr/lib/openvpn/openvpn-auth-pam.so login"
set interfaces openvpn vtun0 persistent-tunnel
set interfaces openvpn vtun0 protocol udp
set interfaces openvpn vtun0 server domain-name mydomain.local
set interfaces openvpn vtun0 server subnet 10.0.1.0/24
set interfaces openvpn vtun0 server name-server 10.0.0.2
set interfaces openvpn vtun0 push-route 10.0.0.0/16
set interfaces openvpn vtun0 tls ca-cert-file /config/auth/ca.crt
set interfaces openvpn vtun0 tls cert-file /config/auth/server.crt
set interfaces openvpn vtun0 tls dh-file /config/auth/dh1024.pem
set interfaces openvpn vtun0 tls key-file /config/auth/server.key
commit
exit

We are almost there. Now we just need to create the .ovpn file. Replace the sections between , , and with the contents of the files /config/auth/ca.crt, /config/auth/company.crt, and /config/auth/company.key. Hint: You can get the contents by typing something like: cat /config/auth/ca.crt.

client
remote VPN.mydomain.com 1194
proto udp
dev tun
resolv-retry infinite
nobind
persist-key
persist-tun

-----BEGIN CERTIFICATE-----
........................................
........................................
........................................
........................................
.........................==
-----END CERTIFICATE-----


-----BEGIN CERTIFICATE-----
........................................
........................................
........................................
........................................
.........................==
-----END CERTIFICATE-----


-----BEGIN RSA PRIVATE KEY-----
........................................
........................................
........................................
........................................
.........................==
-----END RSA PRIVATE KEY-----

auth-user-pass

Install OpenVPN Connect on your iOS 10 device.
Copy your .ovpn file onto your device and open it.
Enter your username/pass and you’re ready to go.

Note: It is not imperative that each person has a unique certificate because they need to authenticate their user/pass in order to connect (and we use their username to register instead of their certificate name). If you are not happy with the security risk of re-using certificates, you can generate a new certificate for each person by using the ./build-key script in the /config/easy-rsa2 folder.

The Fastest and Easiest Way to Clone a PC on a Network

This is a guide for using the automated clone assistant on RestartOS to clone a PC over a network. We have a source PC and a target PC. The source PC has the content that we want, and the target PC’s disk will be overwritten with the data from the source PC’s disk. In this guide both PCs have a single disk drive to keep the instructions simple. If you have more than one disk, you can repeat the steps for each disk.

Target PC

First, we launch the software on the target PC.
clone-target-launch

Then we choose the disk that we want to overwrite and confirm our selection.
clone-target-step1

Source PC

Next, we launch the software on the source PC.
clone-source-launch

We choose the disk that we want to clone and then we wait for the system to find the target PC automatically.
clone-source-step1

We confirm the IP address of the target PC (as is seen in step #2 above) and just press enter (or type “y”) to proceed.
clone-source-step2

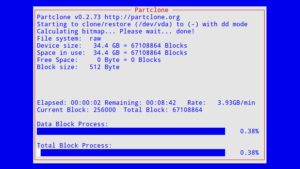
That’s it! The cloning starts. No IPs to type in. No hassle of copying over MBRs. And it’s very fast.. like 15 minutes for a Windows 10 install fast.
success

How To Change a Xenserver VM Type

Here is a quick and dirty script to change the VM type of an existing Xenserver VM. This can be useful if you are, let’s say, using Linux-based cloning software to clone a Windows VM and you want it to run as fast as possible. You may realize that the system runs very slow. That’s because the Windows VM handles paravirtualization differently than the Linux environment will. You have to change the device type, and this script will help. I added a layer of abstraction to simplify the whole process of switching VM types.

Here are examples of how to run the script:
./change-type myvm This will print out the current VM type as either “windows” or “linux”. A numerical ID is printed in [] that designates the current device_id, for your information.
change-type myvm linux This will change the device type from whatever it is now, to linux.
change-type myvm windows This will change the device type from whatever it is now, to windows.
change-type 00000000-0000-0000-0000-000000000000 linux This will change the device type for the machine with the UUID specified.

#!/bin/bash
# /usr/bin/change-type
#
# Written by Pete Lombardo
#
# This script can change the type of hardware for a VM in a Xen Pool(for example, from Linux to Windows or visa versa).
# It can also be used to resolve a blue screen issue after upgrading the tools inside a Windows VM.
#

if [ ! "$1" == "" ]; then
        uuidtest=`echo $1 | sed -e 's/\-//g' | egrep "[0-9a-f]{32}" | wc -l`
        if [ $uuidtest -eq 0 ]; then
                uuid=`xe vm-list | grep -i ": $1" -B1 | grep uuid | cut -d':' -f2 | cut -d' ' -f2`
                name="$1"
        else
                uuid=$1
                name=`xe vm-list | grep "$uuid" -A1 | grep name | cut -d':' -f2 | cut -d' ' -f2-`
        fi
fi

if [ "$1" == "" ]; then
        echo
        echo "Usage: change-type [machine-name] [type]"
        echo "Available Types: linux,windows"
        echo
        exit
elif [ "$2" == "" ]; then
        echo
        echo "Checking the device type for $name"
        if [ "$uuid" == "" ]; then
                echo
                echo "ERROR: System $1 not found."
                echo
                exit
        fi
        type=`xe vm-param-get uuid=$uuid param-name=platform param-key=device_id 2>/dev/null`
        case $type in
                0001)
                        echo "linux [$type]"
                        ;;
                0002)
                        echo "windows [$type]"
                        ;;
                *)
                        echo "linux [$type]"
                        ;;
        esac
        echo
        exit
fi

case $2 in
linux)
        device="0001"
        ;;
windows)
        device="0002"
        ;;
esac

if [ "$uuid" == "" ]; then
        echo
        echo "ERROR: System $1 not found."
        echo
        exit
fi

xe vm-param-set uuid=$uuid platform:device_id=$device

echo
type=`xe vm-param-get uuid=$uuid param-name=platform param-key=device_id`
        case $type in
                0001)
                        echo "linux [$type]"
                        ;;
                0002)
                        echo "windows [$type]"
                        ;;
                *)
                        echo "linux [$type]"
                        ;;
        esac
echo

FreePBX 13 – MySQL Performance – RESOLVED

I resolved the performance issue by running the following commands in MySQL:

use asterisk;
alter table kvstore engine=MyISAM;

My new FreePBX 13 server was causing disk IO contention with my other VMs, so I had a look at the disk writes to the MySQL database. The MySQL databases are the ONLY thing on the VDB disk. Notice anything strange? So did I. The disk usage ramps up over time, so it looks like that periodic Cron job of theirs to refresh the Dashboard has some build up of data that makes the system more and more sluggish as time goes on.

graph_image.php

No known fix yet. Fixed by using the MyISAM engine for the kvstore table instead of InnoDB. Disabling cron is a temporary workaround. Restarting FreePBX (fwconsole restart) may be another workaround.

The Veterans Affairs Scandal

Everyone is furious about the way that our war veterans have been treated in the past, and present. The long waiting lists for medical procedures and the mistreatment of our veterans has caused quite an outrage – and rightfully so. Now there are stories in the news about heads rolling – officials in charge being dismissed from their posts. The problem that I have with this sort of thing is that I believe that it’s purely a public relations move.

It is unreasonable to believe that the head of the VA in a state or town was making policy decisions for the whole country. More than likely, it was budget cuts that were passed in Washington D.C. that put the VA officials between a rock and a hard place. Of course, it’s entirely possible that these guys had the budget and just decided to mistreat veterans. But how many people would do that? What would their motivation be? It is far more reasonable to believe that they got a bad deck of cards and they were trying to make do with it. Now the people holding the cards are the ones that are losing their jobs, but I think it really should be the people who dealt the cards who need to address the nation. They must have had difficult decisions to make, and hearing their thought process would certainly add some clarity over who is at fault, or at least the rationale behind the decisions.

Flight 370 Theory

Since the governments and news organizations have not been able to find anything substantial out about the bizarre disappearance of flight 370, I figure that I will try constructing my own theory.   Here goes..

Facts / Analysis

The copilot was in his 20’s.   The pilot was in his 50’s.   People in their 20’s are much more impressionable and more likely to participate in terrorism.  Learned that from all of the television after 9/11.

It was largely reported that people’s cell phones were “ringing”, despite there not being anyone answering.  Either the entire population on the flight were too timid to stand up to terrorists, or perhaps they were unconscious.    Also, after the plane diverted (and probably changed altitude), it supposedly flew over Malaysia again.   Cell towers would have been available and instant messages or emails or phone calls could have made it through.   Even if a person was unconscious, as long as their phone was on, it would have been receiving emails.  Mail server logs would show that the phone accessed it.   I would expect that further analysis could correlate the IP address of the phone from the logs to a cell tower somewhere.  Roaming would prevent data access, though, but text messages usually work when roaming, so anyone who sent a text messages should be able to track it.   That is another potential way to locate the last known location of the plane.

The ACARS system was disabled from the cockpit, but not from the underbelly of the plane.  So at least one deviant person must have been in the cockpit, not out and about the cabin.

The plane reportedly had enough fuel to travel for 8 hours.

Conclusion

I believe that the copilot killed the pilot.  The pilot then slumped over the controls and the plane descended.   The pilot then got the pilot out of his seat and took over the controls.   Then he switched off the ACARS transmitter and whatever other location tracking systems there were that were turned off.   Then he changed course.  Then the copilot radio’d the tower one last time that all was ok.   He probably got on the intercom and told the passengers that there was turbulence and that they were changing course to bypass it.   Since nobody used or answered their cell phones, I believe that some sort of toxic gas was used in the plane that most likely killed the passengers.   The copilot probably put on his oxygen mask to prevent the fumes from getting to him.   Then the copilot flew the plane, alone, toward the east-Africa or the middle east where he intended to land the plane and use it for a yet-to-be-determined illicit purpose.  If he did land the plane successfully, they would have immediately worked to conceal the plane.  They would have had to hide it in an abandoned air field with a hangar.   Any war torn nation in the region would probably have at least one abandoned air field.   Once inside, they probably cut all power to the aircraft to shutdown all electronics – killing the only remaining functional transmitter.  Then, they probably began to unload all of the bodies of the passengers and then worked to paint a new registration number on the plane.

A worst-case scenario would put that plane back in the air with a new tail number and full of either drugs or bombs.  But since the sale of drugs can fund planes, such a hijacking would probably not take place.   So it would have to be for bombs.

So my final conclusion is…  Flight 370 was hijacked and is going to be re-purposed as a flying bomb.

Update:  My perspective of this whole incident has changed quite a bit as the media has released new information about what might have happened to the plane.   A former pilot also released his own assessment and I think that his assessment paints a picture that could make some sense.   There are still many unanswered questions, though.

New Theory – Fire

The plane was carrying lithium ion batteries in the cargo bay.   The batteries caught fire and the toxic smoke rendered the passengers unconscious.   The pilot, being in the sealed cockpit, had more time than the passengers to act.  He tried to turn the plane around, but heroically tried to fly over the ocean to minimize the risk to people on the ground.   The fire got out of control faster than he expected.  He had to act quickly.  Electricity to the communications systems was disrupted.  The pumps that pump oxygen were not working.  The pilots brought the plane into higher air hoping that the high altitude would extinguish the fire, but since oxygen was not working, they were quickly rendered unconscious.   The plane continued to fly on auto pilot until it ran out of fuel and crashed into the ocean.


Complex Laws

Every once in a while I read about how the tax code needs to be rewritten and how it should be simplified.  When I hear it, I smile first, but then I sigh.   I sigh because the act of simplifying something that is complex is, in itself, a complex task.  Therefore, saying that we simply need to simplify something is understating the effort that will be required to accomplish said goal.

What our politicians should say, is that they want to make strides toward simplifying our tax code.   Even a 1% gain in simplification would keep them true to their word.  That is a goal that I would believe.

Nginx Caching for WordPress

I was searching for a way to enable caching for WordPress and I stumbled across this great article.

http://blogs.law.harvard.edu/djcp/2010/01/nginx-as-a-front-end-proxy-cache-for-wordpress/

In the example that was given, there was an Apache server working the backend while an nginx server was working as a front-end cache.  Those are too many services for me, so I wanted to use just one system.  Nginx.   Here is how I did it (much of this information was taken verbatim from the link above).

First, install the WordPress Nginx proxy cache integrator into WordPress. You can download it from here:
http://wordpress.org/plugins/nginx-proxy-cache-integrator/
Activate it after it is downloaded.

Then create this file:
/etc/nginx/conf.d/proxy-common.conf

proxy_cache_path  /var/lib/nginx/cache0  levels=1:2   keys_zone=staticfilecache:180m  max_size=250m;

proxy_temp_path /var/lib/nginx/proxy;
proxy_connect_timeout 30;
proxy_read_timeout 120;
proxy_send_timeout 120;

upstream wordpressapache {
        #The upstream apache server. You can have many of these and weight them accordingly,
        #allowing nginx to function as a caching load balancer (oh my. Awesomeness abounds.)
        server 127.0.0.1:81 weight=1 max_fails=3 fail_timeout=30s;
}

First, copy /etc/nginx/sites-enabled/default to /etc/nginx/sites-enabled/default.proxy

cp /etc/nginx/sites-enabled/default /etc/nginx/sites-enabled/default.proxy

Then, I changed this line in /etc/nginx/sites-enabled/default from

server {
	listen   *:80; ## listen for ipv4

to this

server {
	listen   *:81; ## listen for ipv4

This basically tells nginx to listen on port 81 instead of 80, which we will find out why soon enough.

Now, edit /etc/nginx/sites-enabled/default.proxy and add the following under the server section.

		
# Set the hostname
proxy_set_header Host $host;

#Set the forwarded-for header.
proxy_set_header X-Forwarded-For $proxy_add_x_forwarded_for;

location / {
     index  index.php index.htm tracker.php;
     # If logged in, don't cache.
     if ($http_cookie ~* "comment_author_|wordpress_(?!test_cookie)|wp-postpass_" ) {
            set $do_not_cache 1;
     }
     proxy_cache_key "$scheme://$host$request_uri $do_not_cache";
     proxy_cache staticfilecache;
     proxy_pass http://wordpressapache;
}

location ~* wp\-.*\.php|wp\-admin {
     # Don't static file cache admin-looking things.
     proxy_pass http://wordpressapache;
}

location ~* \.(jpg|png|gif|jpeg|css|js|mp3|wav|swf|mov|doc|pdf|xls|ppt|docx|pptx|xlsx)$ {
     # Cache static-looking files for 120 minutes, setting a 10 day expiry time in the HTTP header,
     # whether logged in or not (may be too heavy-handed).
     proxy_cache_valid 200 120m;
     expires 864000;
     proxy_pass http://wordpressapache;
     proxy_cache staticfilecache;
}

location ~* \/[^\/]+\/(feed|\.xml)\/? {
     # Cache RSS looking feeds for 45 minutes unless logged in.
     if ($http_cookie ~* "comment_author_|wordpress_(?!test_cookie)|wp-postpass_" ) {
            set $do_not_cache 1;
     }
     proxy_cache_key "$scheme://$host$request_uri $do_not_cache";
     proxy_cache_valid 200 45m;
     proxy_cache staticfilecache;
     proxy_pass http://wordpressapache;
}

location = /50x.html {
     root   /var/www/nginx-default;
}

location ~ /\.ht {
     deny  all;
}

Now run the following to get your site back online.

service nginx reload

How to improve the performance of your web application.

STOP.    Look in the mirror.   Proceed.

If you are a web developer, the first thing that you need to know about performance tuning is that you have more power than you think.   This is not so much a tutorial for you as an eye opening event.  Sure you can throw more memory, more CPU power, or more disk space at the problem.  And certainly, that will help.   But the #1 rule that you should know is that it is unlikely that your code is already as streamlined as can be.  You may need to index your database tables, or perhaps enable application caching, or maybe your SQL queries are performing inefficient joins.   Whatever the case, look at your code before making your employer take money from someone else’s paycheck to pay for that new SAN and that excessive amount of RAM for you.

Verizon Actiontec

Just got my program guide working again on my FIOS cable box.  I configured my Actiontec router to bridge to my Linksys router last week.  Everything was great until my program guide stopped working. It turns out that the broadband Internet ethernet port wanted exclusive access to my internal
subnet. All that I had to do was assign my LAN ethernet port to a different subnet and then everything immediately worked!  Words do not accurately describe the configuration.  I am going to have to post a drawing.